Beast of Reincarnation Quarantine Zones Overview
How Beast of Reincarnation structures its roughly ten sandbox stages — and how to clear them efficiently.
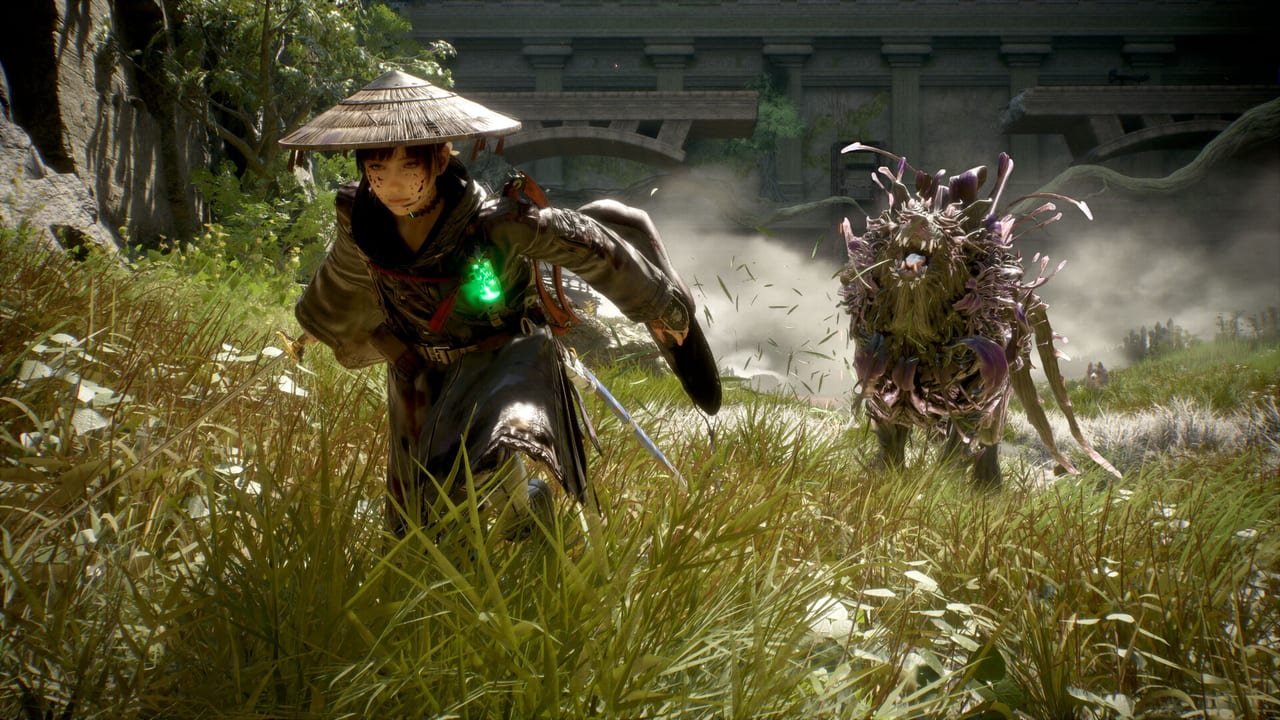
Beast of Reincarnation rejects a single open-world map in favor of wide-linear quarantine zones. Official previews and hands-on reports describe roughly ten major stages set across a post-apocalyptic Japan circa 4026. Each zone is a self-contained sandbox: sprawling enough for optional loot and vertical exploration, but gated by story objectives that culminate in a local Nushi — a colossal malefact whose presence warps the land into a blighted forest.
Understanding that structure prevents the most common launch-week frustration: sprinting main quest markers while under-leveled, under-geared, and unprepared for arena-wide boss mechanics. This page explains what every zone type contains, how they connect narratively without spoiling twists, and which wiki resources to read before entering a new region.
Anatomy of a quarantine zone
Although exact zone names beyond preview areas are best discovered in-game, the gameplay template repeats consistently:
- Entry corridor or landmark — Often a ruined highway, collapsed shrine, or industrial shell that teaches local hazards.
- Sandbox field — Open compounds with patrol routes, mechanical wreckage, and malefact nests. Not a seamless open world, but far wider than the linear Colony tutorial.
- Optional depth layers — Underground bunkers, elevated scaffolding, and hair-traverse shortcuts that hide chests, Spirit Stones, and crafting drops.
- Blight escalation zone — As the local Nushi’s influence grows, foliage overruns paths and enemy density spikes.
- Nushi arena — A dedicated boss space where environment shifts and attack patterns demand prior Down Gauge mastery.
Rest checkpoints appear at camps and safe structures. Critical rule from preview coverage: enemies do not respawn when you rest. Clearing a zone’s outer threats is permanent, which makes scouting a low-risk investment before boss attempts.
Ogouchi Buffer Zone and early progression
Hands-on previews spotlight the Ogouchi Buffer Zone as an early sandbox. Emma and Koo emerge here after the tutorial Colony, facing mixed threats — feral malefacts and rusted mechanical units including slow golem-type walkers preview footage uses as heavy telegraph trainers.
Use Ogouchi to practice three skills:
- Route planning — Identify loop paths between camp, upgrade stations, and the current story gate.
- Koo-led exploration — When Koo reacts to hidden objects, break from the main trail; preview players consistently found gear off the critical path.
- Area denial before bosses — Eliminate outer patrols so Nushi attempts start in a quiet arena instead of a live combat zone.
Detailed onboarding for these habits lives in Getting Started. Combat specifics for stagger loops are in Down Gauge and Lethals.
How zones differ without listing spoilers
Later quarantine regions escalate mechanically even when story details stay hidden. Expect:
- Tighter parry demands on Hard, or wider telegraphs on Story Mode — difficulty is global, not per-zone.
- New malefact families with unique stagger rules, forcing Bloom Art swaps from Koo’s growing list.
- Environmental hazards tied to Blight growth — sudden forest bursts, reduced visibility, or terrain that rewards hair traversal over ground rushing.
- Higher upgrade tiers requiring materials such as Amber, Electronic Brains from mechanical enemies, and purified Decayed Charms.
Zones also vary in verticality. Some emphasize crossbow picks and elevated sniping; others demand melee aggression in cramped ruins. Before traveling, retune Weapons and Gear and Koo Charms for the dominant enemy type rather than keeping one static loadout.
Mobile hub between zones
Emma and Koo’s mobile base acts as the narrative and mechanical bridge between major regions. Return visits handle loadout management, Koo’s Blight cleansing, and optional flashback sequences that flesh out the world’s collapse — without this guide repeating those scenes beat-for-beat.
Treat hub stops as mandatory maintenance: spend SP, upgrade weapons, socket Spirit Stones, and review which Bloom Arts unlocked after your last Nushi. Koo’s strongest arts gate behind Nushi defeats, so zone order directly shapes available tactics. See Nushi Basics for the boss-layer overview.
Exploration rewards worth detouring for
Wide-linear does not mean empty. Priority pickups while zone clearing:
| Reward type | Why it matters |
|---|---|
| Weapon upgrade mats | Immediate DPS and stagger threshold shifts |
| Spirit Stones | Flexible passives that swap per encounter |
| SP bonuses | Unlock Emma and Koo nodes without grinding trash mobs |
| Blight Hearts | Purification unlocks hidden rewards in several zones |
| Koo charm components | Companion modifiers that boost detection or Bloom potency |
If a main gate feels overtuned, the fix is usually one exploration loop away — not repeated boss attempts at base power.
Suggested zone-clearing workflow
Use this repeatable checklist whenever you enter a new quarantine region:
- Activate the nearest rest point and note upgrade stations on the map.
- Sweep the outer sandbox in a clockwise loop, following Koo’s detection cues.
- Return to camp, spend materials, and assign SP with the next Nushi in mind.
- Clear elite pockets blocking the story gate.
- Read Nushi Basics if the local great beast is your first or hardest yet.
- Attempt the Nushi with a quiet arena and full FP bank going in.
Repeat after each rest if new side paths open — hair mobility often unlocks return routes previously unreachable.
What this page intentionally omits
Exact zone names beyond Ogouchi, precise stage counts per act, and post-midgame geography are deliberately excluded to keep the walkthrough spoiler-light. As the community maps every quarantine region, individual zone guides can branch from this hub with the same tactics-first format.
For a full reading list, return to the Walkthrough Hub and pair it with boss and item categories before long sessions.
Frequently Asked Questions
Quick answers to the most common questions.
How many quarantine zones are in the game?
Official previews describe roughly ten wide-linear stages rather than one open world. Exact naming and pacing are best experienced in-game; this hub focuses on the repeating zone structure instead of chapter spoilers.
What is the Ogouchi Buffer Zone?
It is an early quarantine sandbox featured in preview coverage — a ruined buffer region with collapsible structures, mechanical enemies, and optional bunkers where Emma and Koo first practice open-zone exploration.
Do enemies respawn after resting?
No. Once you clear patrols and rest, they stay eliminated. Use that rule to methodically quiet an area before Nushi attempts.
Why do blighted forests appear in some zones?
Nushi — giant malefacts — corrupt the environment into overgrown blighted forests. Their presence marks the highest-threat section of each quarantine zone and precedes the local boss encounter.